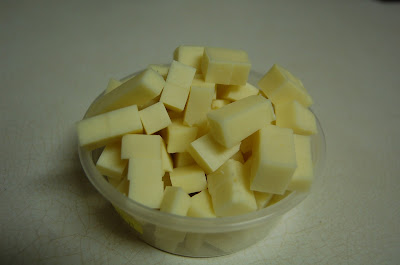
I made the chili and cheese tamales because they're kid friendly, and my family loves them. Start by taking a 2lb. block of Monterrey Jack cheese and cut it into small pieces.
Open your can of chili's and pour them into a wide mouthed bowl, or whatever is convenient for you.
Next you're going to grab your corn husks (the bag on the left), and your masa (the bag on the right). Open your bag of corn husks, pull them out and begin to pull them apart.
Place the corn husks into a sink filled with warm water. Let the husks soak for 30 minutes. After soaking, place the husks on a towel and allow them to air dry.
Next mix your masa in a large bowl. Make sure to mix the masa according to the directions listed on the bag.
My masa directions called for water, so I poured in the water and mixed until smooth.
I added a lil' veggie oil because I always saw my mom do it. I think it makes the masa just a lil' smoother, and yummier once it's cooked.
Once you're corn husks are dry, and your masa is thoroughly mixed and smooth, you're ready to begin putting your tamales together.
Start by taking your corn husk and feeling each side. There will be a smooth side and a rough side. Lay the smooth side down, and place a large spoon full of masa on the rough side. Smooth the masa down toward the bottom of the corn husk, while also making sure not to spread the masa too high up.
When spreading your masa, try to make sure that it's not too thin, and not too thick.
Once your masa is spread smoothly, place a few pieces of cheese and a small amount of chili's in the middle of the corn husk.
Next take the left side of the corn husk and roll it toward the right side like a burrito.
Once you've rolled your corn husk like a burrito, take the top point and fold it down tucking it under nicely.
The front of your tamale should look like this.
This is what the back of your tamale should look like by this step.
Now that you've prepared your first batch of tamales, your ready to steam them. Fill a stock pot of water and place a steamer basket inside. Unfortunately I cannot find my stock pot since moving from California to North Carolina, so I was forced to use a small pot and had to steam mine lying down.
When you place your tamales in your stock pot to steam, stand them up until the are packed around each other, and place the lid over them. Steam your tamales for approximately 30 minutes.
Once your tamales are done steaming, remove them using tongs and place them on a cooling rack until they're cool enough to handle. Once they've cooled, place them in labeled Ziploc bags and toss them in the freezer or refrigerator. I love to make a massive amount of tamales and freeze them. They're so easy to just pull out of the freezer, toss them into the microwave for 1-2 minutes, peel the husk off, and you're ready to eat.
If you freeze and reheat your tamales, make sure to remove your husk after you've reheated.
Whether you eat your tamales right out of the stock pot, or you reheat them out of the freezer, tamales are a true delight!!!
Recipe:
1 4.4 lb. bag of Masa
1 bag of corn husks
2 lb. block of Monterrey Jack cheese
2-3 cans diced green chili's
You should be able to find all of these ingredients at your local Walmart. Depending on the time of year, it can be a little more difficult to find the corn husks. If you don't find them at Walmart, simply Google "Mexican Food Store" followed by the name of your town, and you should have no problem finding them there. Most mexican food stores carry corn husks and masa year around.


No comments:
Post a Comment