Okay, so for the first time in 749,783,283000000 years, I'm alone downstairs. Both girls are asleep in their beds, and Matt's at school. He's actually driving home from school right now, so my alone time is diminishing with every second that passes. I'm cuddled up in my blanket on the couch, and I have the faux fire playing on my tv. I'm gonna be real honest right now...I clicked the music option when the dvd asked me if I want to play the music along with the fire. What you should be aware of is that the music is Christmas music. Yes, I am ridiculous! I know it's still like 3 months and 2 weeks away, but when the cold front moved in last week, so did the holidays. They live in my heart all year round, and now my mind is whirling with images of glorious holiday feasts, pumpkins, hot cocoa, and kids bundled up in their winter coats, while their mothers wipe their snotty noses, lol! Okay, not so much the last image, but you get what I'm saying.
This evening as I was finishing up our evening feast of chicken fried steak, mashed potatoes, gravy, and green beans; my husband walked through the door spilling all his news of the day. Emma was sitting at the kitchen table playing with a mini sand castle kit that one of Matt's customers had given him. With sand sprawled all over the kitchen table, flour and grease in the kitchen, a pile of dirty dishes to wash in the sink, and princess Abby playing joyfully on the floor, yet needing to eat...I became a bit overwhelmed. Additionally, Matt was home to scarf down his dinner, spill about a million words out per minute about all the funny things that Chad (his friend and boss at work) had said today, and then head off to school. Within a 15 minute time frame, I was left standing in the kitchen starring at a 4 year old girl that had rubbed mashed potatoes all the way up her arms, and all over her hair, an even BIGGER pile of dishes, and Abby still needed to eat. I was so tired, that just walking the girls up the stairs to bed at 7pm felt like I was climbing Everest. I persevered up that mountain and tucked the girls into their beds. Of course, that wasn't the last time I was up there. No, someone had a dirty diaper, needed to do a dirty deed on the potty, and I got scolded for forgetting to kiss their teddy bear goodnight.
Once I finally sat down, I contemplated falling asleep, but didn't want to waste my ounce of free time. I knew that soon there would be someone needing me for something, and tomorrow would bring a whole new load of homework, pre-school homeschooling, and the messes. Yes we have started homeschooling Emma and Abby. Emma cried @ pre-school, so we brought that little lady home, and have been pre-schooling it up her @ the homestead ever since. I decided that I would stay awake and enjoy this alone time on the couch with a little faux fireplace to set the mood. There's nothing like a 55 inch fire in the corner of your living room to set the mood for relaxation, lol! However, my alone time is now over. Mr. Robinson just walked through the door, and began to serenade =/ "Silver bells, Summer smells" I knew I would regret pressing "Play music" on the dvd option. He gave me a hug, and said "Oh, you're warm", to which I replied, "It must be the fire I have burning." =) Since my free time is now gone with the wind, I will now conclude this tired mommy post by saying goodnight. Hope all you mommies and daddies have a wonderfully rested night, for tomorrow will bring yet more shenanigans. We desperately need our sleep to face the wee ones, dirty pile of dishes, sand castles, and the like.
Monday, September 19, 2011
Apple Leather
As many of you know, we went apple picking yesterday. As a result, my house is now bursting with apples. My intention in gathering so many apples was to make applesauce, then can it. My girls LOVE applesauce, and can easily go through a jar in 3 days. I would much rather can it then run to the store every 3 days for a $3 jar of the stuff. Additionally, I had hopes and dreams to make apple pie, apple fritters, apple bread, apple butter, and apple preserves. Today I made apple leather and apple fritters. The leather takes 11 hours overall, so it's definitely something you'll want to plan to make on a day when you will be home all day. You can pop it in the oven and let it cook overnight as well. Like the majority of kids on the planet, my kids LOVE fruit roll ups, however I do not like what many of them are made of. I'm a picky mom, and I don't allow high fructose corn syrup, corn syrup, artificial anything, and definitely no preservatives. I thought what better way to give my kids the opportunity to have the yummy fruit roll ups without feeding them the yuckiness, then to make them myself. So here we go-------------------->


Once the apples are done cooking, drain the water from your pot. Transfer the apples into your blender or food processor, and puree until the apples are thoroughly blended. Add nutmeg, cinnamon, and 2-3 tbsp local honey to taste. Give it a good blend one last time to mix all of the spices and sugar.


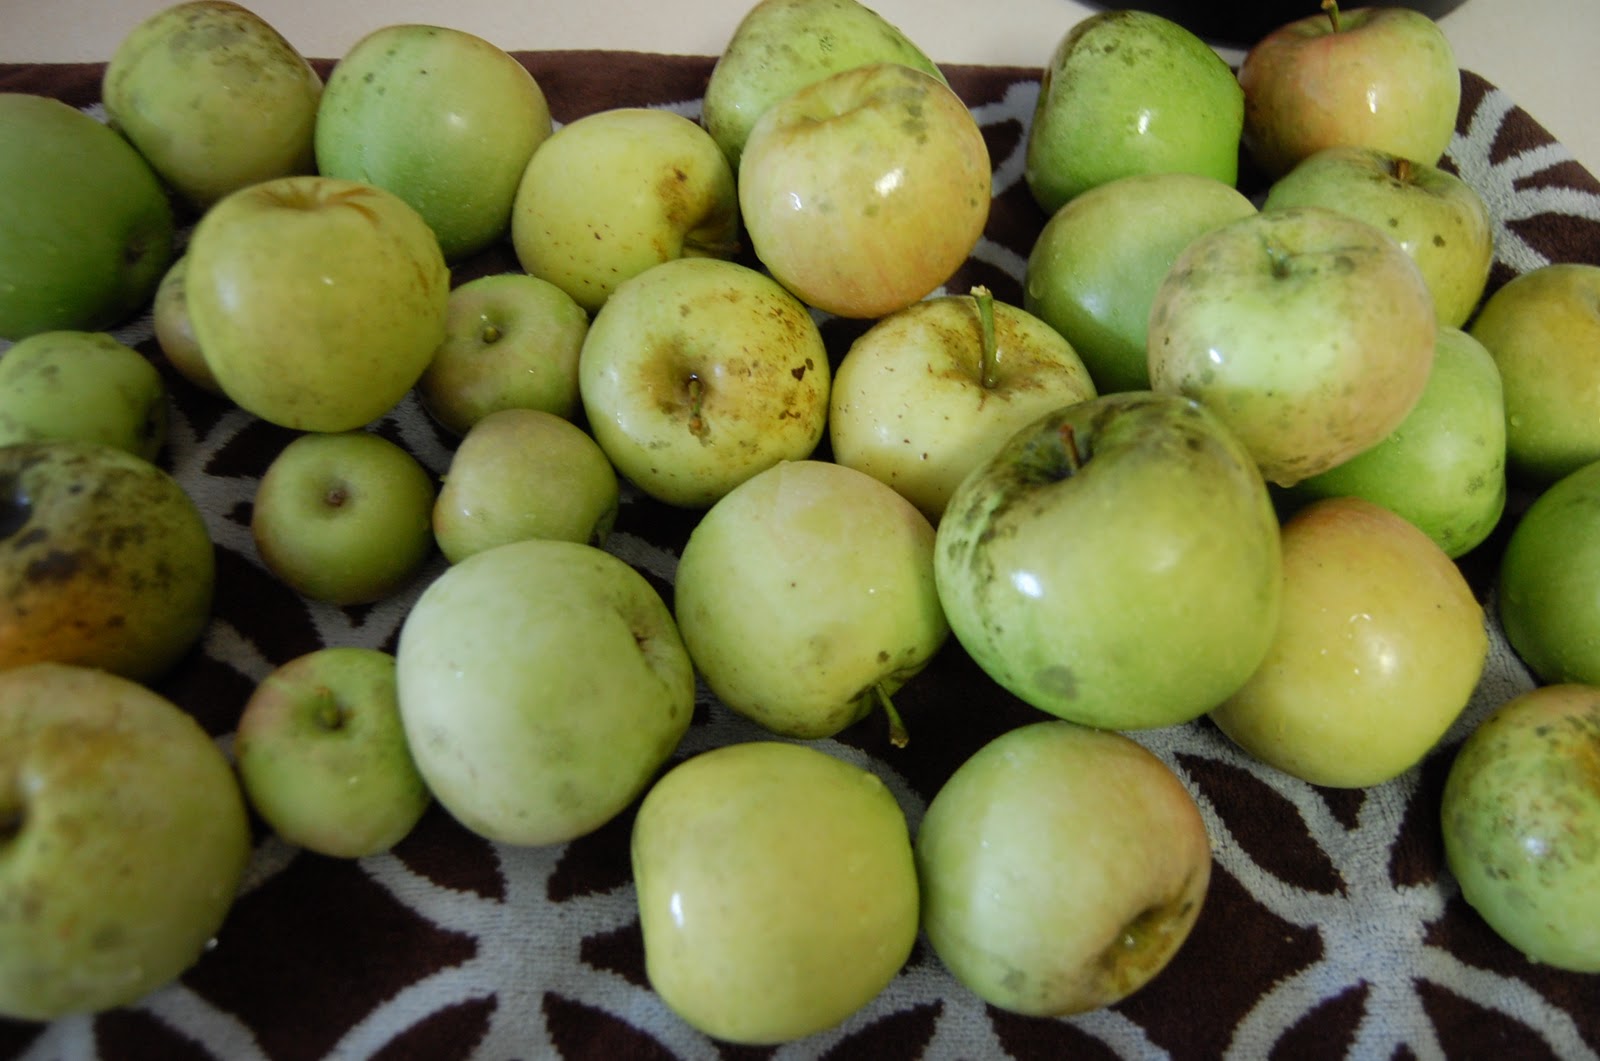
To start, gather approximately 30 apples. You can cut this in half if you don't want to make this much. The amount of apples you use will not affect the recipe at all.

Peel and core your apples.

Take them off and place them in a large bowl.

Once all of your apples are peeled and cored, place them in a large pot. Run water over the apples until the water covers the top layer of apples. Cook the apples on medium heat for 15 minutes, or until they're soft enough to mash. Depending on the size of your pot, you may have to cook your apples in several batches. While your apples are cooking, set your oven at 170 degrees F.


Grab a baking sheet and place a sheet of sturdy, microwaveable plastic wrap down. Pour the apple puree onto the baking sheet, and spread to about an 1/8 to 1/4 inch thickness. Make sure that none of the plastic falls over the puree, this could cause it to not dry out.
Place your baking sheet in the oven at 170 degrees F for 11 hours.
Once your Apple Leather is done, let it cool before you try to peel it off of the plastic wrap. You'll know it's ready when it peels off easily. You can wrap the leather up in the plastic wrap it was cooked in, then place it in an airtight container to store.
Since I just started my Apple Leather at 11am, I don't have a picture of a finished product, but will post it this evening as soon as it comes out of the oven. You can make fruit leather with any of your favorite fruits. That's a wrap =)
Recipe Ingredients:
30 Apples of your choice
Cinnamon to taste
Nutmeg to taste
2-3 tbsp. local honey
30 apples makes 2 large baking sheets, and 1 small sheet.
4 cups of fruit = 1 baking sheet of fruit leather.
Alternatives to cooking in the oven for 11 hours:
Dehydrator
Lay fruit out on a tray, place outside on a hot, sunny day, and tent with cheese cloth. The fruit will dehydrate over the course of the day.
Friday, September 16, 2011
Amish Carmel Corn
Friday night in my house is movie night. Following dinner, we serve popcorn and candy on a blanket in the living room, picnic style. Lately I've been thinking about how I can get away from the candy intake during movie night. Emma usually asks for marshmallows and gummy candy, but because I'm not a fan of the ingredients that those candies are made of, I've been thinking of alternative options. The thought of carmel popcorn came to mind this morning as I was boiling the chicken for Italian Chicken Soup. I began to gather my ingredients, and realized that I didn't have any corn syrup (which I'm not a fan of either). Instead, I decided to make a simple syrup to replace the corn syrup. This carmel popcorn is absolutely delicious, and the whole family will LOVE it!!! Are you ready to make some Amish Carmel Corn? Let's do this!!


Begin by gathering your ingredients for your simple syrup if you decide to replace the corn syrup with it. Pour 1 c. of sugar, and 1 c. of water into a small pot. Boil until the sugar is dissolved. Take syrup off of the heat and set aside.

Up next, turn your oven on at 325 degrees F. Now you're going to pop 3 bags of microwave popcorn. I used buttered popcorn, but you can use whatever kind you'd like. It all works great!

Once the popcorn is done, pour an even amount onto 2 greased baking sheets.

In a medium pot, combine 1 c. butter or margarine, 2 c. brown sugar, 1/2 c. simple syrup or corn syrup, and 1 tsp. salt.

Over medium heat, bring your mixture to a boil, stirring constantly for 5 minutes (during boiling period).
After the 5 minutes is up, remove from heat immediately. Add 1tsp. vanilla, 1/2 tsp. baking soda and stir.

Immediately pour your syrup evenly over the 2 baking sheets of popcorn. Toss popcorn with a spatula to evenly coat. Place your baking sheets into the oven for 1 hour. Every 15 to 20 min., give your baking sheets a light shake to make sure the popcorn is evenly cooking.

While the corn is baking, take this opportunity to set wax paper out on your counter. Once the corn is done, pour it out onto the wax paper, and allow to cool completely. Store in an airtight container, or in Ziploc baggies.

A great idea if you're serving this to the wee ones: Buy a couple of the pop corn boxes like they serve at the circus or the theatre, and dish it up. My girls love this, and it makes a great memory! Enjoy!!!
Here's the recipe:
Ingredients
Ingredients for Simple Syrup
Thursday, September 15, 2011
Creamy Roasted Apple & Butternut Squash Soup Served in an Acorn Squash Bowl
When I woke up this morning, I had no intention on making this soup for dinner. I really had no dinner plans, and soup was the last thing on my mind, seeing as we're having it tomorrow night. As I've done so many times before, I opened the freezer and starred in at the stacks of frozen meat, vegetables, fruit, and frozen bread. I have an obsession with buying different types of bread, and then freezing them for later. I'm always afraid we'll run out, as if I couldn't just go buy more if we needed it, lol! Anyway, I poured Emma a bowl of cereal, and as I reached across the table to hand it to her, my eyes met the butternut squash that had been adorning my table for the last 2 weeks. It was magical, and I instantly knew that I would make butternut squash soup for dinner. I have made a variation of this soup with pumpkin before, but never with butternut squash. With my mind whirling with the glorious soup possibilities, I began to mentally plan the meal. Next to the butternut squash sat 3 beautimous acorn squash'. What could be better than a butternut squash soup in a bowl made from an acorn squash? That pretty much screams "Hello Fall" to me!!! I made a declaration at that moment that Fall would officially begin in my home and heart today. I know I'm a few weeks early, but I have a confession...I bought 4 baking pumpkins at the store last night =) Oh yes I did!!! Okay, so enough of my yada yada...let's get down to business.
 To begin with, you're going to set your oven for 400 degrees F, and then toss your butternut squash into the microwave for 5 minutes to soften it up. While the squash is in the microwave, pour a tsp. or two of olive oil onto a baking sheet. Once the squash is done, take it out and place it on a carving board. Peel the skin off, and then grab yourself a big ol' sharp knife and cut it into cubes, making sure to discard all seeds and strings. Place the cut squash onto the prepped pan, and then move onto your 2 cloves of garlic. Peel your garlic, and place them on the pan. Grab your medium sized onion, peel, and cut it into chunks. Cut 1 sweet potato into small chunks and place them on the baking sheet along with the onion, and toss with 1 to 2 tbsp. of olive oil, season with salt and freshly ground pepper. Now you're ready to place your sheet of veggies in the oven to roast for 40 min.

 Grab 2 Fuji apples and core and peel them. Cut them into medium size pieces and set them beside your oven. You're going to want to stop your veggie timer half way through so that you can place your apple pieces onto the pan to roast with your veggies. Roast for the remaining 20 min.
 While your fruit and veggies are finishing their roast, let's move onto prepping our acorn squash bowls. You're going to need some foil to make what I like to call "Foil nests". Take a piece of foil and roll it up loosely from each end. Once you're close to the center, make sure you leave a hole for your acorn squash to rest its booty on.
 Set your foil nests aside, and grab those beautiful acorn squash, a serrated knife, paring knife, and your cutting board. Lay your squash on its side and cut the bottom off with the serrated knife to create a flat surface.
 Once you've done this to each of your squash, set them on their flat side, and grab your paring knife. Holding the squash close to your body while still allowing it to sit on the cutting board, cut a circle (as best you can) out to create the opening of your bowl. Pull the top off, and cut the pith (stringy guts of the squash) off with the serrated knife. Repeat with each squash.
 It's now time to scoop all of the pith (inside of the squash) out. I used a stainless steel tbsp., but you can use anything that fits in there, and scoops well. You definitely want to make sure to get all of the seeds out, as well as the strings, as they don't have a very good texture.

Meanwhile, your roasted fruit and veggies should be done, so now set your oven on 325 degrees F.
 Now that you have the squash all clean inside, place each of them on the foil nests, and bake for 45 min.
 Are you ready to puree! Grab your blender or food processor and pour your roasted fruit and veggies in. Pour 1/3 cup of vegetable broth in and pulse the mixture until it's smooth and creamy.
 I added my sweet potato toward the end of the puree because I had one left over from dinner two nights ago, so it was perfect!

Transfer your puree to a big pot, and place it on the stove. Cook over low heat, and stir in 1/2 c. of milk, 1/2 c. of heavy whipping cream, and 2 c. vegetable broth. Whisk together, and grab your spices! Throw in 5 dashes of cinnamon, 1 small dash of nutmeg, 4 dashes of pumpkin spice, and a generous amount of dried thyme. Whisk it all together, place the lid on your pot, and let sit for 30 min allowing the ingredients to marry, and the soup to heat through.
 By now your acorn squash bowls should be ready! Yayyy, let's take them out and let them cool a bit.

Once the acorn squash are done cooling, and the soup is heated through, ladle the soup into the squash, top with brown sugar, and tear off some big chunky bread for dipping. Voila! Soup's on!!!!
*An additional tip for parents of infants taking baby food, or parents of special needs kids that only eat pureed food:
Take the left over squash bowls, cut out the roasted flesh, and toss it in the food processor or blender. Once the squash is creamy, add the left over squash soup if you have any, and puree the veggies together. Pour into small left over yogurt containers (the ones that come with lids), and freeze them until feeding time. This is a win, win situation. Your child wins because it tastes good, and you win because it's chocked full of fruits and veggies.
Here's the Recipe:
Ingredients
Here are a few pics of the peeps that enjoyed the soup tonight in my casa =)


Meanwhile, your roasted fruit and veggies should be done, so now set your oven on 325 degrees F.


Once the acorn squash are done cooling, and the soup is heated through, ladle the soup into the squash, top with brown sugar, and tear off some big chunky bread for dipping. Voila! Soup's on!!!!
*An additional tip for parents of infants taking baby food, or parents of special needs kids that only eat pureed food:
Take the left over squash bowls, cut out the roasted flesh, and toss it in the food processor or blender. Once the squash is creamy, add the left over squash soup if you have any, and puree the veggies together. Pour into small left over yogurt containers (the ones that come with lids), and freeze them until feeding time. This is a win, win situation. Your child wins because it tastes good, and you win because it's chocked full of fruits and veggies.
Here's the Recipe:
Ingredients
- 1 whole Butternut Squash (2-3 Pounds, Peeled, Seeded, And Chopped)
- 1 whole Sweet Potato (peeled, Seeded, And Chopped)
- 1 whole White Onion (medium)
- 2 cloves Garlic
- 2 Tablespoons Olive Oil
- 1 teaspoon Salt
- ½ teaspoons Pepper
- 2 wholeFuji Peeled, Cored, And Chopped
- 2 cups Vegetable Stock
- 5 dashes of cinnamon
- 4 dashes of pumpkin spice
- 1 small dash of nutmeg
- Generous amount of dried thyme
- ½ cup Half-and-half
- ½ cup Milk (whole Or 2%)
Here are a few pics of the peeps that enjoyed the soup tonight in my casa =)


Notice the pumpkins on the bottom right corner of the picture of Matt (click on pic to enlarge). It is Fall, and I don't care what the calendar says, lol!!!
Subscribe to:
Posts (Atom)